

Sheffield Home Project: Transforming Floors with Self-Leveling Screed and Luxury Vinyl Tiles
Sep 11, 2024
2 min read
0
18
0
At Selrite Interiors, we pride ourselves on delivering flooring solutions that not only look stunning but also stand the test of time. One of our latest projects, Sheffield Home, is a perfect example of our attention to detail and expertise. The project involves two key phases: preparing the floors with self-leveling screed and installing Luxury Vinyl Tiles (LVT).
In this blog, we’ll take you through the process we followed for Phase 1: Self-Leveling Screed and provide a glimpse of what the final product could look like once LVT is installed.
Why Choose Self-Leveling Screed?
A solid, even foundation is critical for any flooring installation. Self-leveling screed offers the following benefits:
Smooth Surface: Creates a perfectly even base, crucial for seamless LVT installation.
Durability: Reinforces the subfloor, ensuring long-term stability and reducing the risk of cracks or imperfections in the future.
Time-Efficient: Dries quickly, allowing us to proceed with the next phase - LVT installation—without long delays.
Steps Involved in Phase 1: Applying Self-Leveling Screed
Step 1: Surface Preparation Before any screeding could take place, we began by thoroughly cleaning the existing floor. We removed all debris and uneven patches to ensure that the screed would adhere properly. Surface imperfections like cracks or holes were addressed to ensure a flawless final result.
Step 2: Priming the Surface Once the floor was prepped, we applied a primer to enhance the bonding of the screed to the existing floor. This step is crucial in ensuring a strong and stable foundation.
Step 3: Mixing the Screed The self-leveling screed was mixed with precision to ensure the right consistency, allowing it to flow and settle smoothly across the entire floor. This was a critical step in making sure the floor is perfectly level and ready for the next phase.
Step 4: Pouring and Spreading the Screed After the mixture was ready, we poured the self-leveling screed onto the prepared surface. Using specialized tools, our team spread the screed evenly across the floor, allowing it to fill any remaining dips or imperfections naturally.
Step 5: Letting It Set Once the screed was applied, we allowed it to set and dry. Within a few hours, the screed created a durable, smooth surface that’s now ready for the final phase: LVT installation.
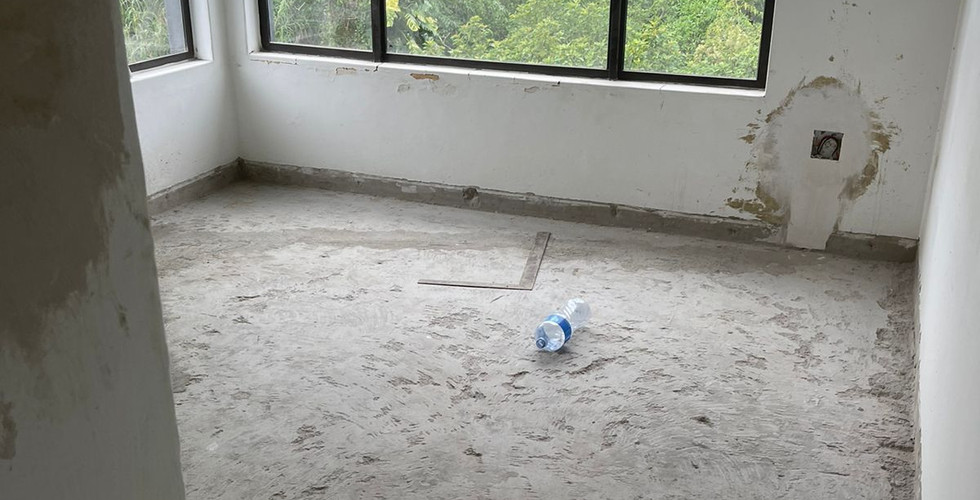
Here’s a before image of the room, showcasing the self-leveling screed after it was applied:


Phase 2: Luxury Vinyl Tiles Installation
Now that the screed has set, we are excited to move on to the second phase - installing Luxury Vinyl Tiles (LVT). These tiles are both durable and stylish, offering a wood-like appearance without the high maintenance. The LVT installation will elevate the room’s overall look while providing a practical, long-lasting flooring solution.
Here’s an example of what a finished room will look like after LVT installation:

Contact Selrite Interiors
If you’re looking to transform your space with expertly installed flooring, whether it’s through self-leveling screed or luxury vinyl tiles, look no further than Selrite Interiors. Our team is ready to assist with consultations, site assessments, and project planning.
Visit our Self-Level Screed page or contact us today to learn more about how we can bring your vision to life.
Related Posts

